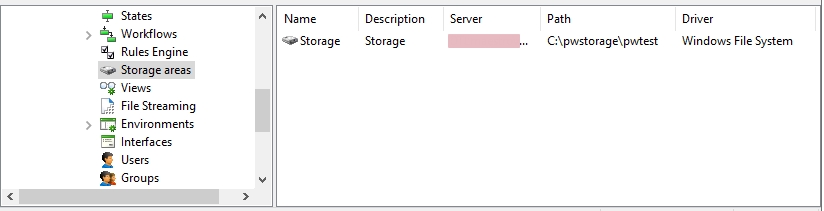
Managing Storage Areas
The storage area is the physical location where the master copy of a document gets stored when the document gets added to ProjectWise. When creating a folder in ProjectWise Explorer, the user creating the folder selects which storage area to associate to that folder. Whenever a document is added to that folder, the master copy of the document gets sent to the storage area that is associated to that folder.
Every datasource has at least one storage area, which the administrator establishes when creating the datasource. You can set up additional storage areas as needed after the datasource is created, either on the ProjectWise Integration Server, or on a ProjectWise Caching Server installed on another computer.
Storage areas are secure when they can only be accessed by ProjectWise. Prevent bypass of ProjectWise access controls by making storage areas secure. Use your operating system's controls to prevent mounting of ProjectWise files or allowing FTP access to ProjectWise files.
Required User Settings for Managing Storage Areas
The initial administrator account has full permissions to create, modify, and delete storage areas. If you want to let another user manage storage areas, add them to the Administrator group, and then turn on the following storage area user settings for that user:
:
- Can create - When on, the user can create storage areas for the datasource.
- Can delete - When on, the user can delete storage areas in the datasource.
- Can modify - When on, the user can modify properties of the storage areas in the datasource.
- Show all properties - When on, the user can see all properties of all storage areas in the datasource. When off, the user is prevented from seeing the location of storage areas as well as disk usage information, and can only see the name and description of storage areas.
To Create a Storage Area
Use these steps to create a storage area that resides on the ProjectWise Integration Server or ProjectWise Caching Server.
- Right-click the
Storage
areas
node and select
.
The New Storage Area Properties dialog opens.
- In the Name and Description fields, enter a name and optional description for the storage area.
- In the
Computer name or IP address field, enter the
name or IP address of the server on which
ProjectWise Integration Server or
ProjectWise Caching Server is installed
and running. This is the server on which the storage area will reside. You can
also click
Browse to search for the server name.
If the ProjectWise Administrator you are working from is installed on the same server as ProjectWise Integration Server or ProjectWise Caching Server, then the local server name will be displayed by default in the Computer name or IP address field.
- In the
Path field, enter the full path to the folder
you would like to create and establish as a
ProjectWise storage area.
For example: C:\pwstorageareas\pwtest1_main_storage
The folder you specify (in the example above, pwtest1_main_storage) will be created when you click OK. You cannot use an existing folder to create a new storage area.
Important: Make sure that the location you select for your storage area in the Path field is somewhere within the allowable storage location, as set during server installation and defined in the server's DMSKRNL.CFG file. In the example above, C:\pwstorageareas is the allowable storage location, and pwtest1_main_storage is the actual storage area. -
Click
OK.
The storage area folder is created on the specified ProjectWise Integration Server or ProjectWise Caching Server, and the new storage area is added to the list of storage areas in ProjectWise Administrator.

Use these steps to create a storage area that resides on a remote server, using a UNC path:
- On the remote server on which the storage area is to reside, create and share a folder (for example, C:\sharedfolder).
- Set up permissions on the shared folder so that the domain or computer account under which ProjectWise Integration Server or ProjectWise Caching Server is running can access and write to it. (In other words, on the shared folder, give Read and Write permissions to the domain or computer account under which ProjectWise Integration Server or ProjectWise Caching Server is running.)
- In ProjectWise Administrator, right-click the Storage areas node and select .
- In the Name and Description fields, enter a name and optional description for the storage area.
- In the Computer name or IP address field, enter the name or IP address of the server on which ProjectWise Integration Server or ProjectWise Caching Server is installed and running.
- In the
Path field, enter the UNC path to the shared
folder on the remote server, followed by the new storage area folder you want
to create inside that shared folder.
For example: \\remoteserver\sharedfolder\pwstore1
- Click
OK.
The storage area folder is created on the remote server, and the new storage area is added to the list of storage areas in ProjectWise Administrator.
Configure the FileAccessTokenServers Setting in DMSKRNL.CFG on the ProjectWise Caching Server
Storage areas can be managed by the ProjectWise Integration Server, or by a ProjectWise Caching Server installed on another computer. Whenever a user tries to access a file in ProjectWise, the ProjectWise Integration Server generates an access token for the file and sends the token back to the ProjectWise client the user is working from, which then sends the token on to the server that is managing the storage area where the master copy of the file exists. If the server managing the storage area trusts the server that generated the token, then the server accepts the token and sends a copy of the requested file to the user.
To ensure that the ProjectWise Caching Server only accepts file access tokens generated from trusted ProjectWise Integration Servers, you MUST specify the names of these trusted servers in the FileAccessTokenServers setting in the DMSKRNL.CFG file on the ProjectWise Caching Server computer. If the ProjectWise Caching Server receives a file access token that was generated by a ProjectWise Integration Server that it does NOT trust (because the server's name is not listed in the FileAccessTokenServers setting), then the ProjectWise Caching Server will not accept the file access token and will not send a copy of the requested file to the user.
You can configure this setting during ProjectWise Caching Server installation, or any time after installation by manually entering the required ProjectWise Integration Server names in the ProjectWise Caching Server's DMSKRNL.CFG file. When specifying the name of a ProjectWise Integration Server, you must enter the full server name as it appears in the ProjectWise Integration Server's DMSKRNL.CFG file, as this is how the server name will appear in the file access tokens that are generated from that ProjectWise Integration Server. Separate each server in the list with a comma. Do not use wildcards.
For example:
FileAccessTokenServers=server1.domain.com,server2.domain.com
To View Storage Area Disk Usage Information
To view disk space information for a storage area, open the properties dialog of a storage area and select the Disk Usage tab. This tab shows the amount of space the storage area currently occupies, and how much space is still available.
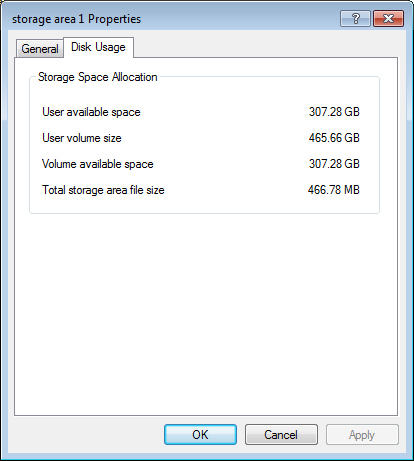
It is possible to establish a disk space quota which puts a limit on how much of the available disk space may be used by the ProjectWise storage area on this server. Specifically, the quota is set for the user under which the ProjectWise Integration Server or ProjectWise Caching Server service is running. When configuring this feature of the operating system, make sure the system setting, Deny disk space to users exceeding quota limit is ON (). This will ensure that the correct value is always displayed in the User available space field on the Disk Usage tab.
To Move a Storage Area
Use these steps to move a storage area to another location on the same server, or to another server altogether:
- Right-click a storage area and select Properties.
- If you want to move the
storage area to another folder on the same server, do the following:
- In the Computer name or IP address field, do not change anything.
- In the
Path field, enter the path to the folder
you want to move the storage area to.
For example:
Change C:\pwstorageareas\pw_old_storage
To C:\pwstorageareas\pw_new_storage
or
If you want to move the storage area to another server, do the following:
- In the Computer name or IP address field, specify another server on which ProjectWise Integration Server or ProjectWise Caching Server is installed and running.
- In the Path field, either keep the existing path or change it as necessary.
If the folder specified in the path field does not already exist on the server, then it will be created when you click OK. Unlike when creating a new storage area, ProjectWise lets you specify an existing folder when moving a storage area.
- Click
OK.
A warning message appears, informing you that after you change the storage area location, that you need to manually move the contents from the old location to the new location.
- Click OK to make the change.

Use these steps if you want to move a storage area to a remote server, using a UNC path:
- On the remote server you
want to move the storage area to, create and share a folder, so that it can be
accessed and written to by the
ProjectWise Integration Server or
ProjectWise Caching Server.
For example, create and share a folder called C:\pwstorageareas\newsharedfolder.
- In ProjectWise Administrator, right-click a storage area and select Properties.
- In the Computer name or IP address field, you can either keep the specified server the same, or change it as necessary. All that is required is that this field specifies a server on which ProjectWise Integration Server or ProjectWise Caching Server is installed and running.
- In the
Path field, enter the UNC path to the shared
folder on the remote server that you want to move the storage area to.
Some examples:
Change C:\storagearea to \\remotecomputer\pwstorageareas\newsharedfolder\ In this case you are saying that you want to change the location of the storage area, from its local folder on the ProjectWise Integration Server or ProjectWise Caching Server, to the root of the specified shared folder on another server. Change \\remotecomputer\oldsharedfolder\ to \\remotecomputer\pwstorageareas\newsharedfolder\ In this case you are saying that you want to change the location of the storage area from one shared folder to the root of another shared folder, on the same remote server. Change \\remotecomputerA\oldsharedfolder\ to \\remotecomputerB\pwstorageareas\newsharedfolder\storage In this case you are saying that you want to change the location of the storage area, from a shared folder on a remote server, to a subfolder of a shared folder on another remote server. When you specify to move the storage area to a subfolder of the shared folder, it will be created when you click OK. (Unlike when creating a new storage area, ProjectWise lets you specify an existing folder when moving a storage area.)
- Click
OK.
A warning message appears, informing you that after you change the storage area location, that you need to manually move the contents from the old location to the new location.
- Click OK to make the change.